

This is the edited picture, as you can see by the screenshot below, how i did it on lightroom, to make the clouds more darker, but the grafitti stand out more, to highlight the purpose of the photo. I've also shown arrows, highlighting leading lines, which is an example of a framing technique. It gives a sense of direction, and maybe the lines leading to an area maybe similar to the bridge (a gritty town also full of graffiti), or a place completely different.

I will now present how I've edited this photo step by step!
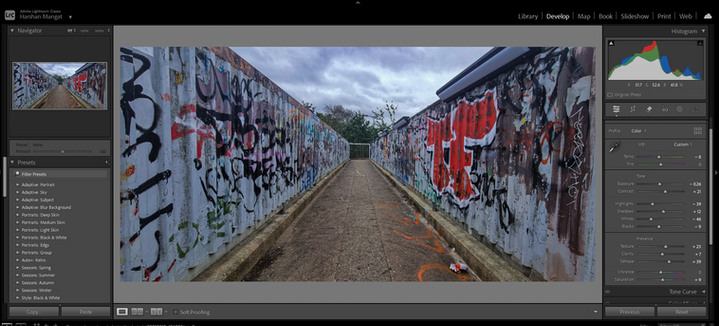
Step by step editing process


First I put the picture in lightroom and used filters as shown, to make the picture darker grey, instead of a dull grey sky.

Then after I've used a masking brush tool, to make it darker, and highlight shadows, to intensify the picture, as I want the theme to be a dark gloomy theme, making the viewer cautious.

Then on the right you can see I've used a dodge tool, to then highlight the subjects (the two people walking), to make them stand out from the darkness


The lime bike at the bottom I took to a google website to remove it, and then done, it was that simple, just highlight it.


And that is how I edited this picture, and hopefully this creates inspiration or a helpful guide for anyone that wants to edit pictures.
As you can see there is leading lines displayed in the picture, and I took the original picture on my phone with a rule of 3rds grid. Which makes the picture more interesting as it draws the viewers eyes to the main subject, as well as the leading lines, making the viewers eyes leading upwards to the subject iswell.